Weblinks are only generated if the documents access to set to Public. After you click on upload, and you ensure the access drop down box is set to public, you will see the weblink displayed on the next page. The weblink includes the HTML code you need to post on one of your pages for it to be a clickable link by the public. Be sure to copy everything including and between the < and >.

Mass messages can be sent to anyone within your department via Text or Email. Sending a mass text message requires that you have populated all of your members cell phones numbers and providers in to their profiles.
To send a mass email, hover your mouse over the Admin tab and select Messaging. On the menu located on the left side, click on Email. Select the station you want the message to go to, the subject of the message and the message it self, then click send. Your message will be sent to the email addresses located on everyones profiles.
To send a mass text message, hover your mouse over the Admin tab and select Messaging. Select the station you would like the message to go to, then type your message and click send. Your text message will be delivered via SMS to every cell number on file within the members profile as long as their service provide is correct.

Configuring your members cell phone information is done from the
members profile. Every member has access to add their own cell phone information.
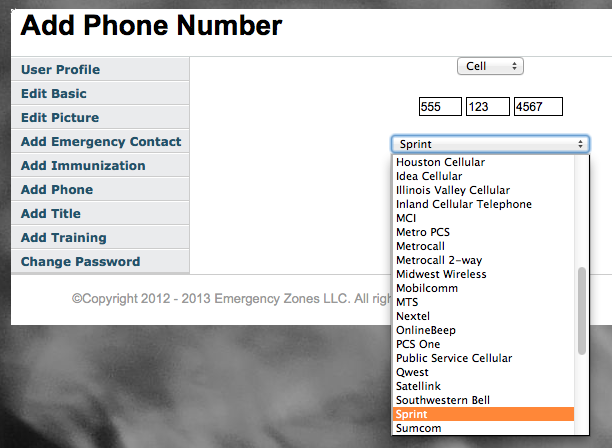
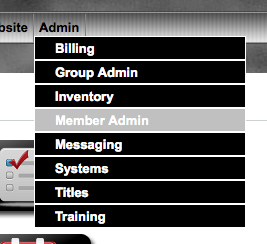
Navigate to the members profile you would like to edit (Click My Profile if the member is logged in, or Admin tab > Member Admin if you are logged in as the administrator). Once on their profile, click Add Phone, then type the cell phone number and select the service provider. Please be sure the correct service provider is selected or the message may not be delivered!

If you forgot your password, navigate to your member’s section (https://members.company.org), then click on the link at the bottom of the page for forgotten passwords. Then type in your email address and it will be sent to your email address. If you do not receive an email within ten minutes, check your spam folder. If you still did not receive it, email us, support@emergencyzones.net.


1. First navigate to your members section page and login.
2. Hover over Admin, and select Member Admin.

3. Type in the name of the person who are you adding as an administrator, and click Search.

4. Select the name of the person from the results listed.

5. On the left hand menu, select Add Group.

6. You will then see a blank drop down box, click on it and select Admin. Then click Add Group.

**NOTE: If the drop down box does NOT display anything, the user is already in the group!
1. First navigate to your members section page and login.
2. Hover over Website, and select Pages.

3. Click on Images on the left side menu.

4. Click on Add Images at the top of the page.

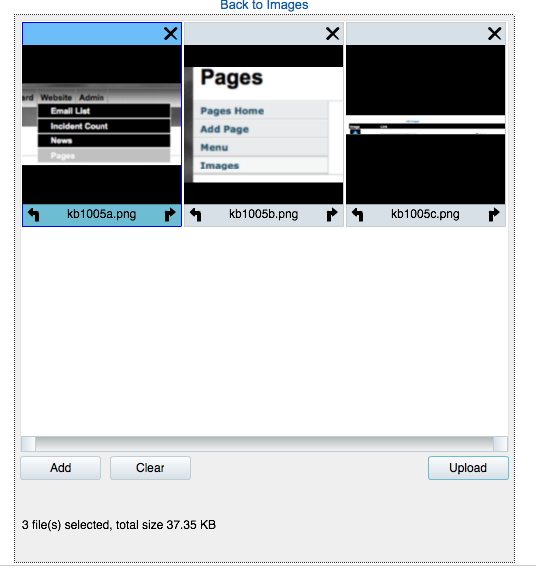
5. Click Add on the lower left corner.

6. Select the image you want to upload, OR hold the Ctrl key down and click on multiple images to upload multiple images. Then click Open.


7. You can remove images by clicking the X in the upper right corner of the image, or rotate the images using the arrows below the image. Click Upload once your images are to your satisfaction.

8. You will now see your image(s) and a weblink to the right of them. Highlight the weblink, right click on the highlighted part, and select Copy.

9. Click on Pages Home on the left side menu, then click on the “page” you want to add the image to.
10. In the “Body” of the page, find the location where you want to put your image, then add the following code: <img src=”YOUR WEB LINK HERE”> Be sure to replace YOUR WEB LINK HERE with the link you just copied. Simply right click and paste the link.

11. Click Update Page below the body, and your page should now display your image.
**NOTE: Not everyone knows HTML, if you are having issues, please do not hesitate to contact us!